SherpaDesk provides the ability to import into the system the Users of Mapped Groups from Office 365 and automatically synchronize this data in separate night replication process. SherpaDesk imports only security enabled groups from Office 365.
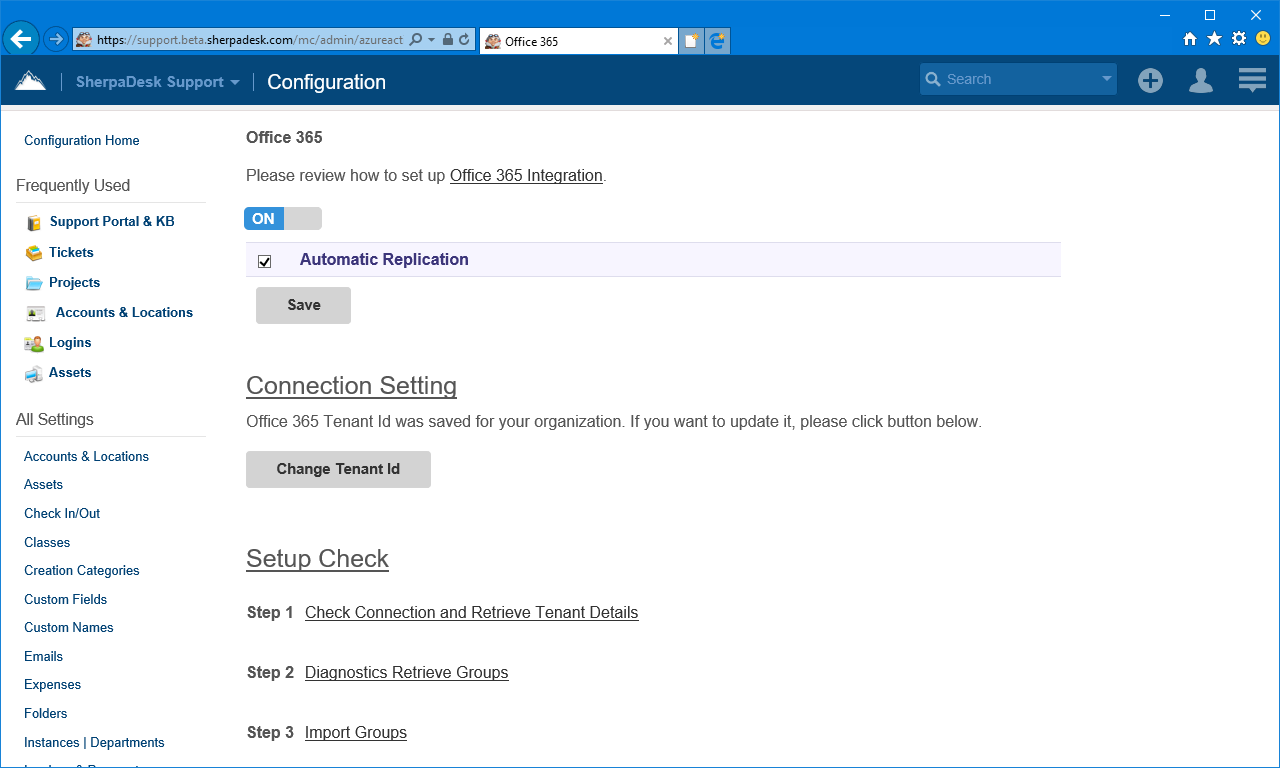
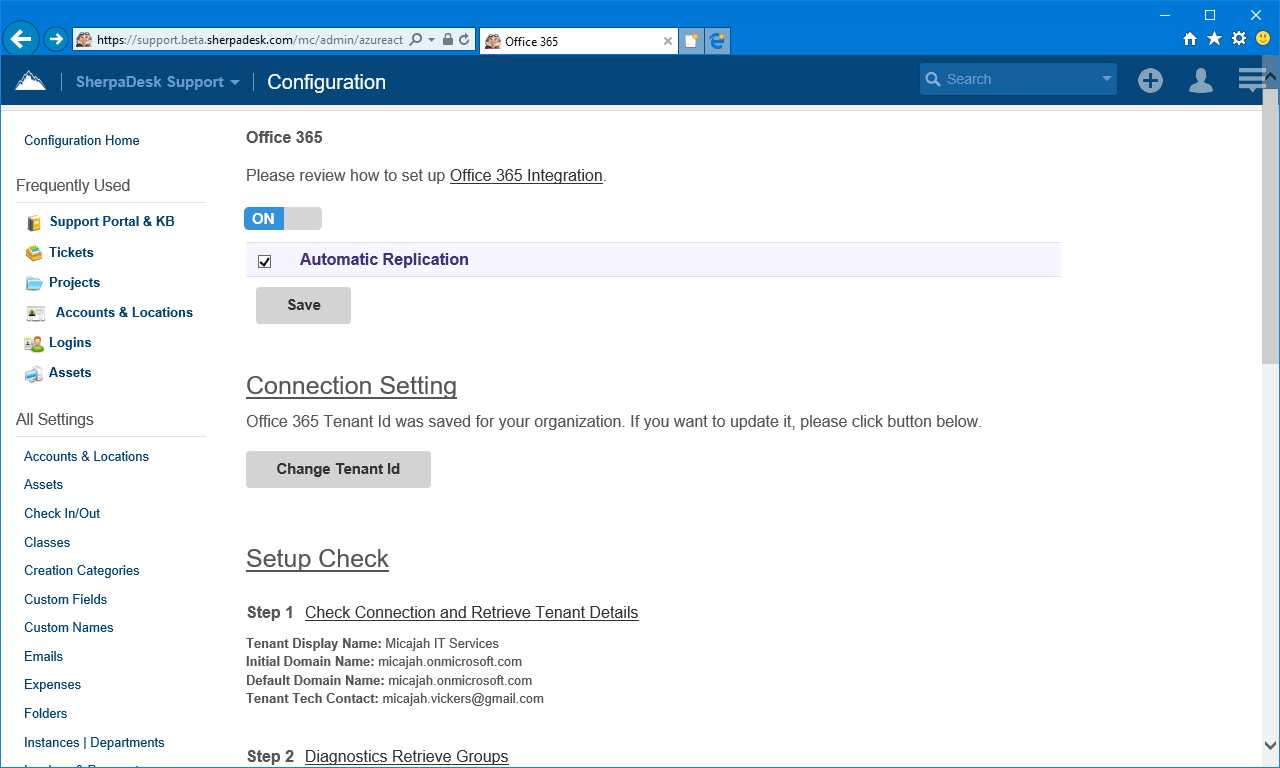
To setup data replication from Office 365 log in to SherpaDesk web application under administrator’s account, go to Configuration->Office 365 page and turn on the feature.
You can enter the name of field in Office 365 to sync with User Unique ID in SherpaDesk: specify "id" for User Unique Key.
You can enter the name of field in Office 365 to sync with User Location in SherpaDesk: specify "officeLocation" for Office.
Click “Get Tenant Id” button.
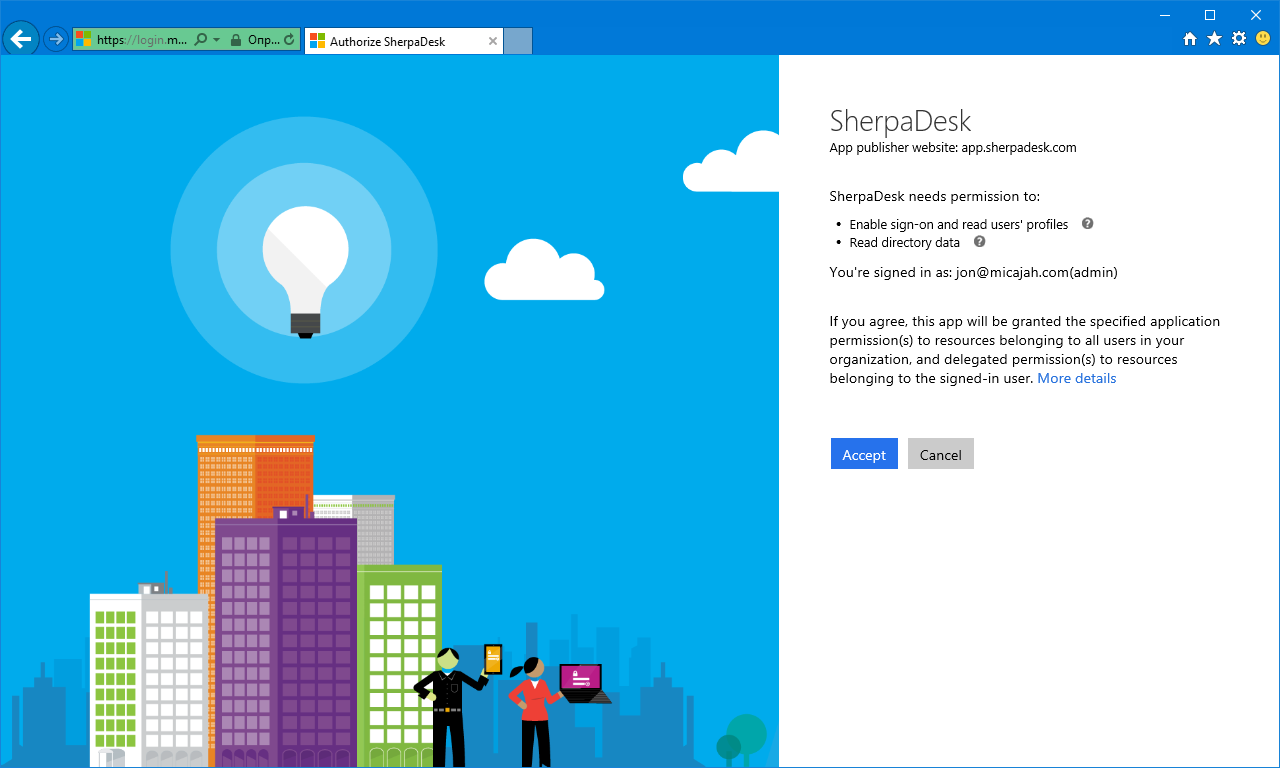
Once you initiate the Office 365 sync and it is authenticated we are now able to read and update your data.
SherpaDesk provides a nightly sync option to automatically manage your data going forward, but you can turn it on or off.
NOTE: Once this process is started the system will replicate your data into the SherpaDesk on a nightly replication.
Use View Replication Logs page to monitor the state of the replications.
Review our troubleshoot article if you have are having troubles.
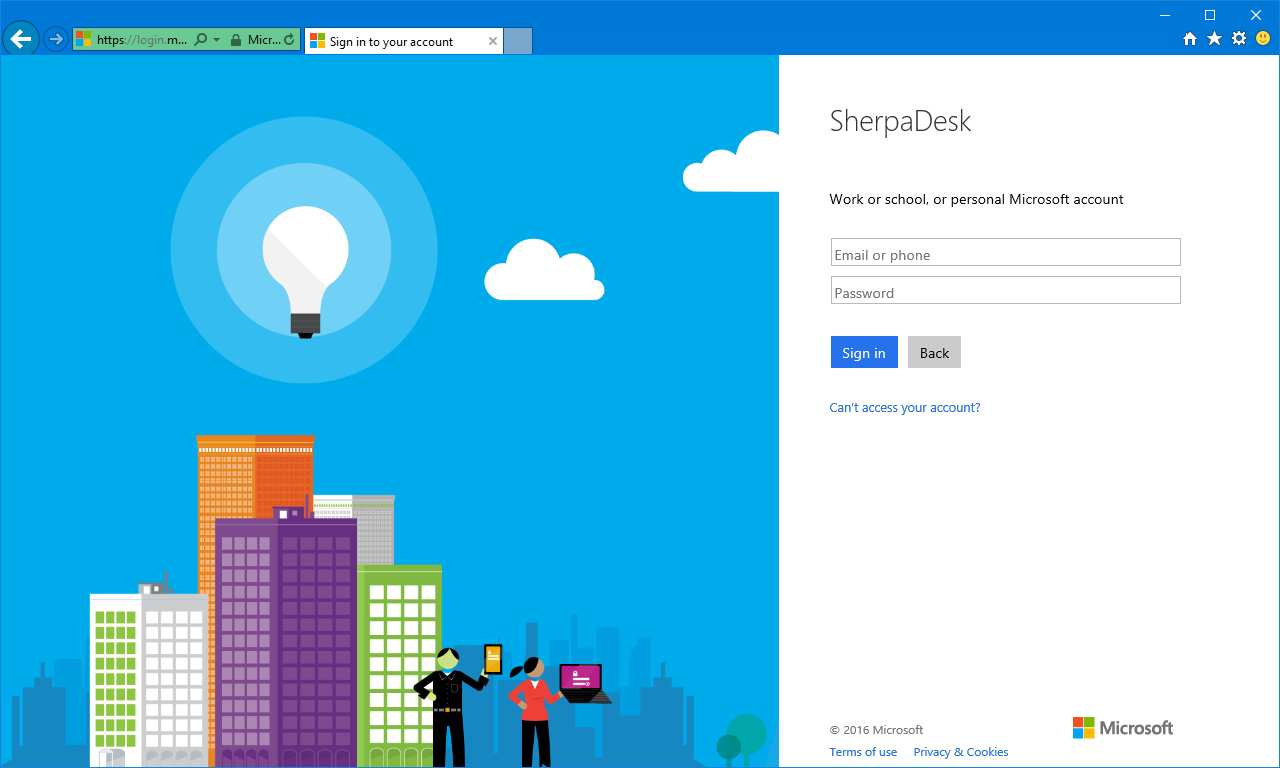
Sign in to Office 365 under administrator’s account.
Click “Accept” button to grant access to the SherpaDesk.
Office 365 configuration page displays the message “Office 365 Tenant Id was saved for your organization”.
Click hyperlink in “Step 1” to Check Connection and Retrieve Tenant Details.
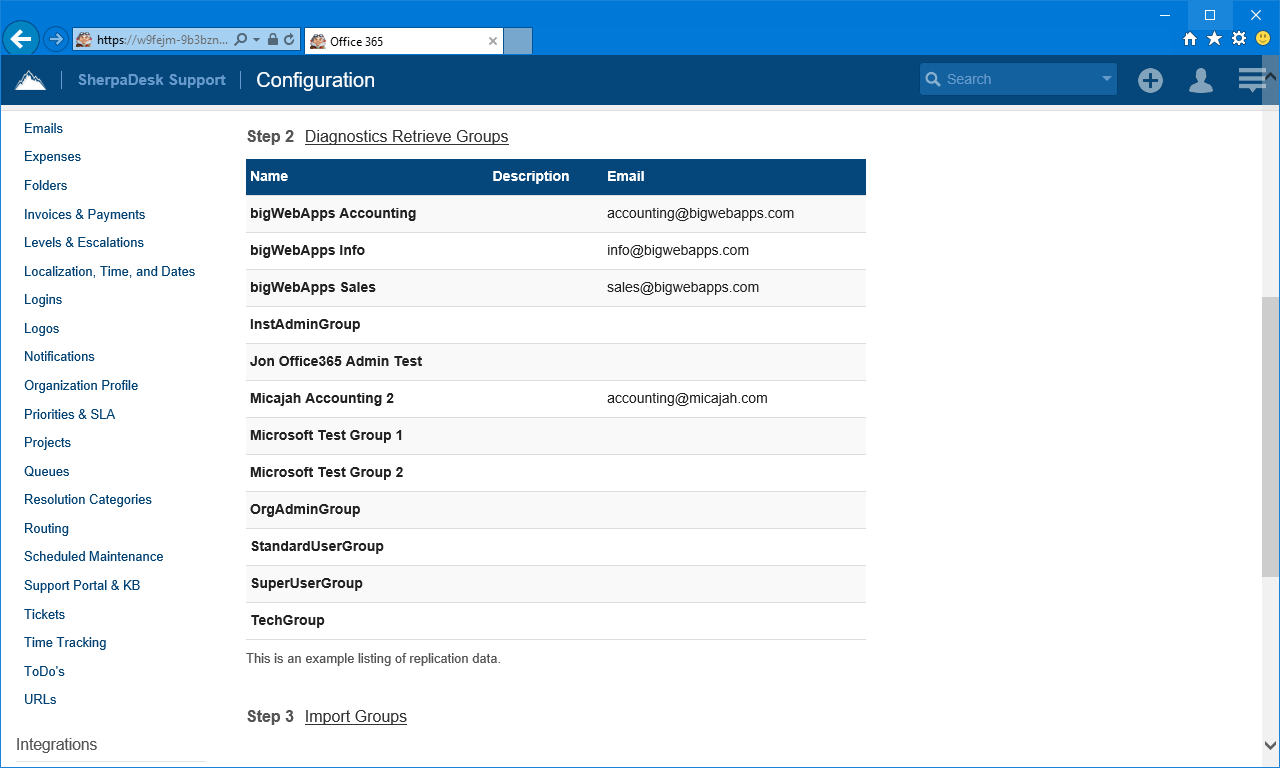
Click “Diagnostics Retrieve Groups” hyperlink in “Step 2” to retrieve top 25 Groups from Office 365 as example of replication data.
Import the Groups from Office 365 by clicking “Import Groups” hyperlink in “Step 3”.
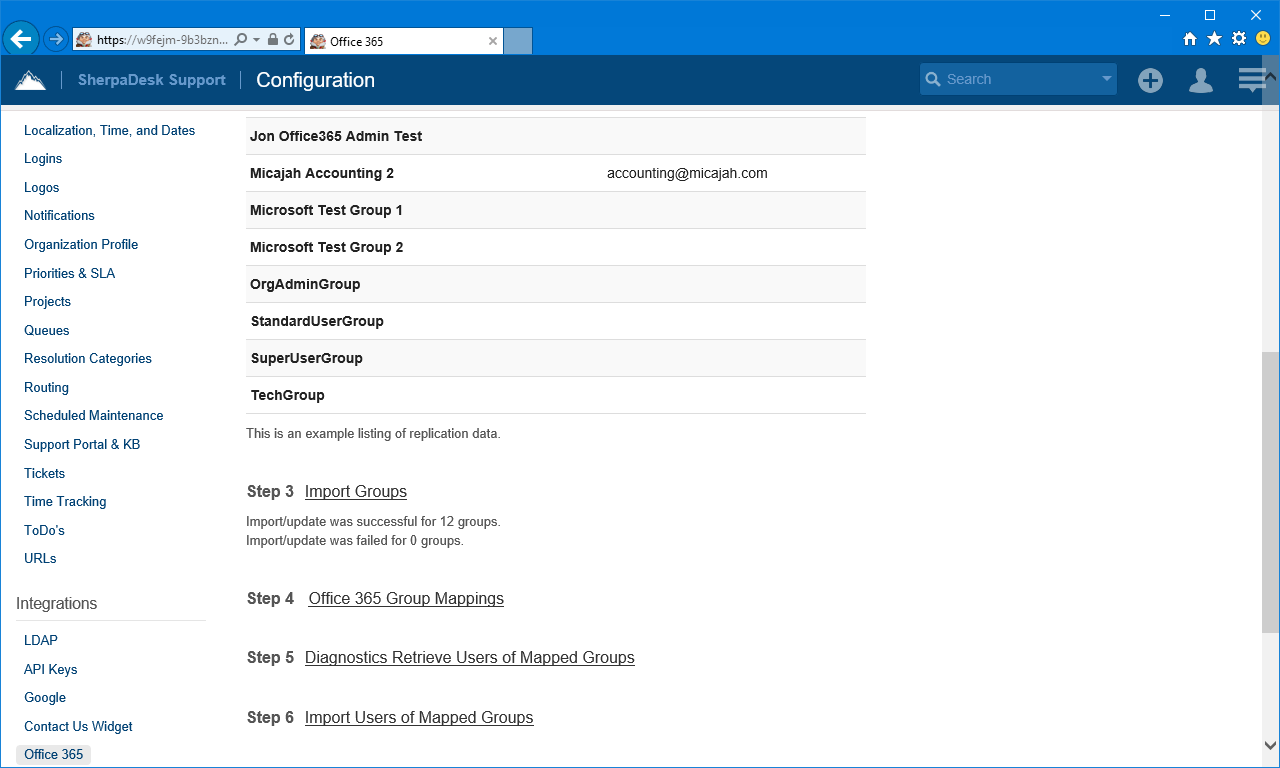
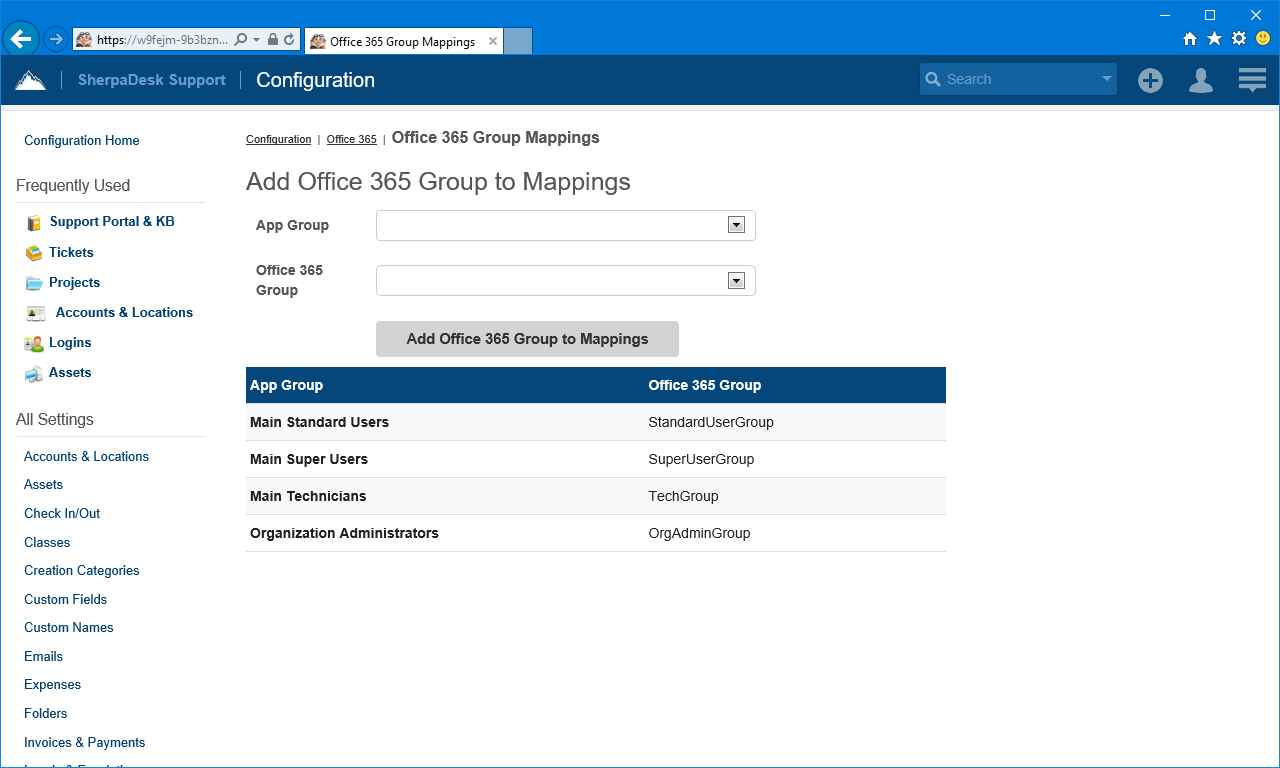
Click “Office 365 Group Mappings” hyperlink in “Step 4” to configure mappings of SherpaDesk App Group to Office 365 Group.
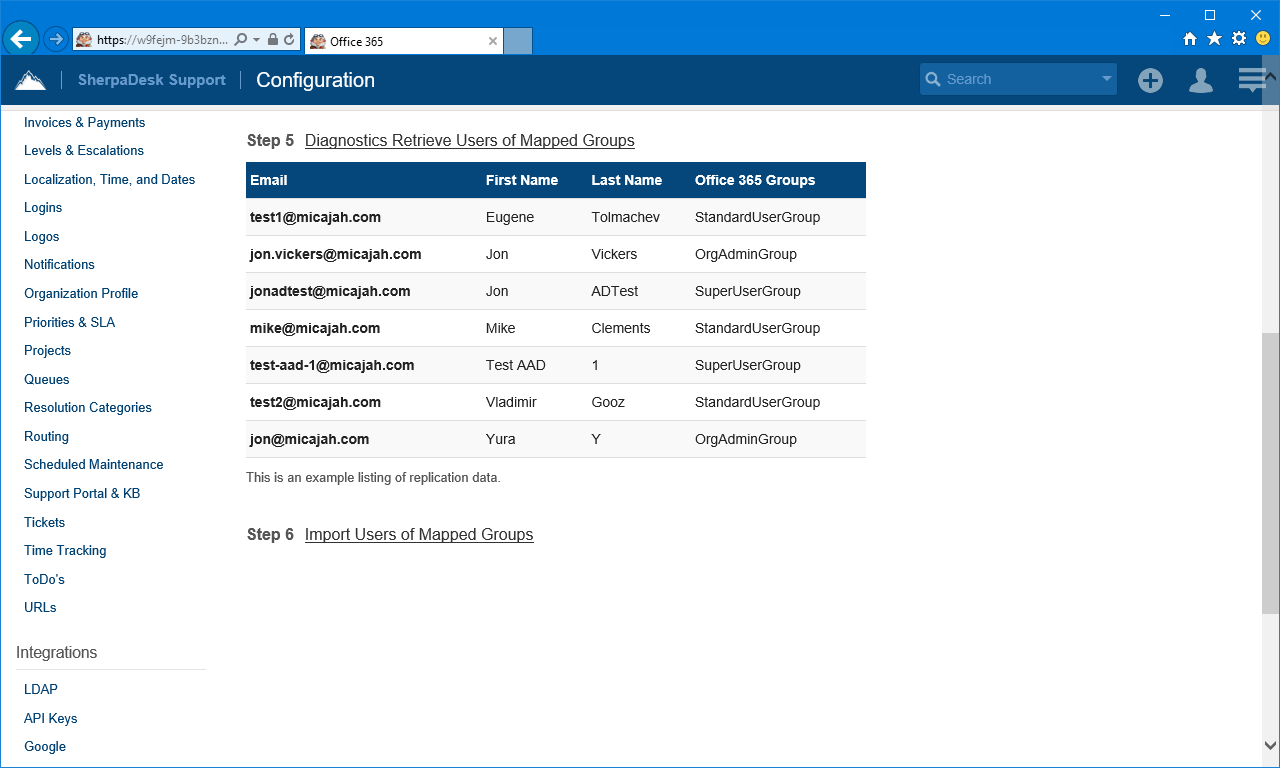
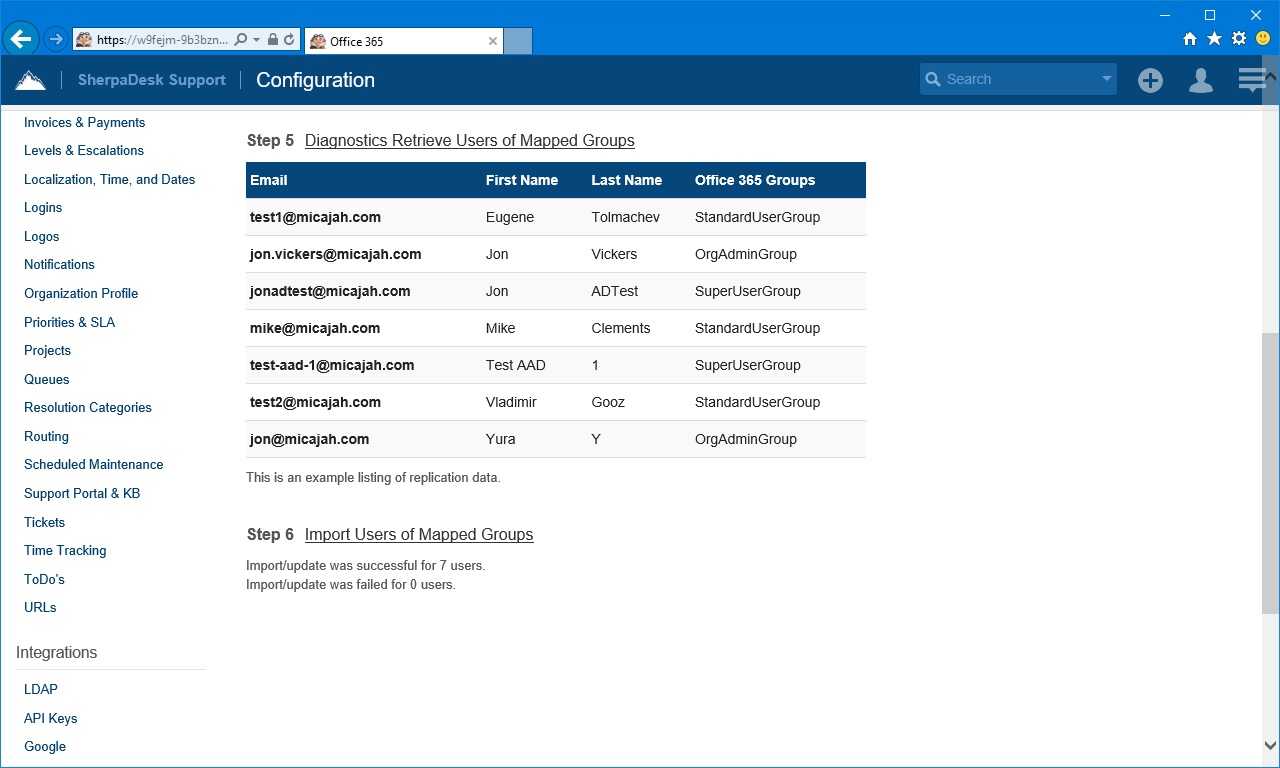
Click “Diagnostics Retrieve Users of Mapped Groups” hyperlink in “Step 5” to retrieve top 25 Users of Mapped Groups from Office 365 as example of replication data.
To manually import the Users of Mapped Groups from Office 365 click “Import Users” hyperlink in “Step 6”.
Now Users are imported and able to log in to SherpaDesk web application using Single Sign-On.
Troubleshoot
In case the replication reported an error please try to reset your Tenant.
To completely reset the Tenant please do the following steps:
- Login to Azure AD portal under admin account and delete the SherpaDesk Enterprise Application: https://portal.azure.com/#blade/Microsoft_AAD_IAM/StartboardApplicationsMenuBlade/AppAppsPreview/menuId/
- Open SherpaDesk web app and go to the "Configuration" > "Office 365 /Azure AD" page.
- Click the "Reset Tenant" link, log in as admin to your Azure AD account, and grant all requested access.